About Me

My photo
I'm a guy who likes to cook, eat, and drink, but not necessarily in that order. This blog is nothing fancy; just my random thoughts about anything that can be baked, roasted, or fried. Enjoy!

Thursday, July 31, 2014

Eggs Were Definitely First!

At one point in his book Medium Raw, Anthony Bourdain lists several things that everyone should know how to cook. One of these is the omelet. I couldn’t agree more, but I would add one more item: scrambled eggs. Scrambled eggs are deceptively complex. Because of their simple preparation, there is little room for the aspiring chef to hide mistakes. And what is the most frequent mistake made by a home cook? Overcooking. Most folks scramble eggs until they are devoid of any last ounce of moisture or silkiness, leaving dried tasteless clumps better served to the condemned. Simply put, scrambled eggs require a lot more attention than most would think. As M.F.K. Fisher noted: “This concoction is obviously a placid one, never to be attempted by a nervous, harried woman, one anxious to slap something on the table and get it over with.”

Scrambled eggs were one of the first things I learned to cook. In an old family photo album there’s a picture of me, about five years old, standing on a stool over the stove making bacon and eggs one morning. My father took the picture after my mom had left for work, so this little bit of domestic child labor, and its evidence, remained hidden from my mother for many years. When she discovered that my father had permitted me to stand over a frying pan on a hot stove at the tender age of five, she was not amused. I, other hand, thought it was great fun!

So, how do I make scrambled eggs these days? Needless to say I’ve learned a few things since I was five. Here’s how I make them.

The Insouciant Chef’s Scrambled Eggs

Heat a non-stick pan over low-medium heat. (Another mistake a lot of people make in cooking scrambled eggs is cooking them at too high a heat.)

Take two or three eggs and whisk them in a bowl with salt and pepper until the yolk and the whites are thoroughly mixed.

Pour the eggs in the pan but leave them alone! Fight the urge to immediately start stirring stuff around. Once the outer edge of the eggs have started to cook, stir the eggs with a fork (larger tines will give you bigger curds, while smaller ones will give you finer curds) or spatula.

Just when the eggs are coming together but not dried out, remove the pan from the heat and add one to two tablespoons of cream. This stops the eggs from cooking and gives them, well, a creamy texture!

Voila! 

Now back to the omelet. For some reason, the omelet scares the hell out of the home cook. Perhaps it’s the flipping onto the plate that seems so daunting. How else would one explain the endless parade of RonCo-but-wait-there’s-more omelet gadgets advertised late at night during re-runs of I Dream of Jeannie. The omelet is actually a quick and easy meal. And it can be prepared in myriad ways depending on the ingredients one adds. And you certainly don’t need a recipe for making an omelet. I learned everything I needed to know about making an omelet from watching Julia Child and Jacques Pepin on YouTubeJulia Child Makes an Omelet Jacques Pepin Makes Omelettes

Child & Pepin’s Omelet

Step 1: Heat a nonstick skillet over medium-high heat.

Step 2: Whisk two or three eggs in a bowl. According to Julia Child, anything more than three eggs and you’ll end up with a tough omelet. The egg yolks and the whites should be thoroughly mixed. Season the eggs with salt and pepper. If you are feeling up to it, add some thyme, parsley, chives, or chervil.

Step 3: Put a tablespoon of butter in the pan and once it has melted and just before it starts to brown, pour in the eggs. 

Step 4: Shake the pan vigorously back and forth toward and away from you. You can also stir the eggs in the middle of the pan with a fork while you shake the pan. The goal is to create small curds. Add any ingredients you wish to add.

Step 5: With a spatula, fold the omelet over onto the other half, then tilt the pan with one hand while grasping the handle. Tap the edge of the pan on the counter and slide the omelet onto the plate.

Step 6: Garnish and eat!

And that’s all there is to it. Two simple, yet classic egg dishes that will impress the lucky person you may be having as a guest for breakfast. There are also few foods as cheap and sustaining as the egg. They even come with their own bio-degradable packaging that keeps for weeks.  The perfect ingredient for the great, simple meal!

Sunday, July 20, 2014

Italian Without the Pasta

Recently, I’ve discovered that Costco sells some great cookbooks. And nearly every time I go there to stock up on my two-years’ supply of toilet paper and four-gallon tubs of pub mix, I invariably find a one. As a result, I almost own Ina Garten’s complete Barefoot Contessa oeuvre. 

©2014 Chris Terrell
But during my most recent trip, I discovered something new and surprising: an Italian cookbook published by Phaidon titled, Vegetables from an Italian Garden. As you can gather from the title, it is dedicated entirely to Italian vegetable recipes. It is divided into four sections, one for each of the four seasons and the vegetables that are prominent during those seasons. And not a pasta recipe in sight.

For you see, “authentic” Italian food is not as pasta-heavy as its Italian-American cousin. In fact, in Italy pasta is not the main meal, as is typical in America, but a small preliminary course. So after I purchased this book, I decided I would make an Italian meal without any pasta. The only carbs on the plate would come from the garden, or at least someone else’s garden.

The Saturday morning of my pasta-less “experiment,” I headed out to the farmers market with nothing particular in mind. I find a farmer’s market a lot more fun when you go there without an agenda. After a few minutes, I grabbed a big, beautiful, fleshy eggplant. And, a few minutes after that, some cherry tomatoes. I find eggplant to be the most intriguing vegetable out there, though I rarely know what to do with it. Sometimes I buy one, only to watch it wither on my kitchen counter. This time, however, would be different. Because eggplant is so popular in Italian cookery, I was sure to find an interesting dish in my new cook book. I wasn’t disappointed.

What I found was a recipe for marinated eggplant, not marinated in vinegar or lemon juice, but rather olive oil, It turned out to be a flavorful summer dish. Here’s the recipe:


© 2014 Chris Terrell
Melanzane Marinate
(Marinated Eggplant)

Ingredients

1 large eggplant, cut into 1/4-inch-thick slices
3/4 cup olive oil
1 chile, seeded and chopped
3 cloves garlic, finely chopped
1 tablespoon capers, drained, rinsed, and chopped
10 mint leaves
salt and pepper

Preparation

Put the eggplant slices in a colander, sprinkle with salt, and let drain for about 30 minutes. Heat a heavy, nonstick skillet. Rinse the eggplant, pat dry, and brush with some of the oil. Add the eggplant slices to the skillet, in batches if necessary, and cook over high heat until golden brown on both sides. Combine the chile, garlic, capers, and mint in a bowl and season with salt and pepper. Make a layer of eggplant slices in a salad bowl, sprinkle with a tablespoon of the chili dressing, and continue making layers until all the ingredients are used. Pour in the remaining olive oil and let marinate in a cool place for at least 6 hours.


Next, it was time to turn to the tomatoes. Cherry tomatoes may be one of my favorite kinds of tomatoes. You can pop them right in your mouth; put them in a salad; or roast them, which is probably the best way to serve them. I found an excellent recipe for roasted tomatoes using balsamic vinegar! And while the recipe calls for regular tomatoes, cherry tomatoes work just as well, don’t require any cutting (put them in the roasting pan whole) and they cook faster. Here’s the recipe.

© 2014 Chris Terrell
Pomodori All'Aceto Balsamico in Forno
(Baked Tomatoes with Balsamic Vinegar)

Ingredients

4 tablespoons olive oil, plus extra for brushing
1 teaspoons balsamic vinegar
8 tomatoes halved (or pint and a half of cherry tomatoes)
1 sprig of thyme
salt and pepper

Preparation

Preheat the over to 350 degrees. Brush an ovenproof dish with oil. Whisk together the oil and vinegar in a bowl and season with salt and pepper. Put the tomatoes into the prepared dish in a single layer, brush with the oil and vinegar mixture over them, and sprinkle with the thyme. Bake for 15 minutes, then reduce the oven temperature to 225 degrees and bake for at least another 1 hour. (If using cherry tomatoes, you can bake at the higher temperature for about 30 minutes.) Remove from the oven, transfer the tomatoes to a serving dish, and serve either hot or cold. 

Finally, I needed a little protein to go with this meal. I didn’t want to make a trip to the store, so I pulled out some frozen chicken breasts (also from Costco!) and grabbed my copy of The Silver Spoon. As I’ve written in this blog before, this is the only Italian cookbook you will ever need. Here’s what I found:

Involtini di Pollo alle Acciughe E Capperi
(Chicken, Anchovy, and Caper Roulades)

Ingredients

4 salted anchovies, soaked in water and drained
4 skinless, boneless chicken breasts
3 tablespoons drained and rinsed capers
2 tablespoons butter
1 tablespoon olive oil
1 onion, thinly sliced
1/4 cup white wine
salt and pepper

Preparation

Lightly pound the chicken with a mallet. Divide the anchovies and capers among the chicken portions, roll up, and secure with toothpicks. Heat the butter and oil in a large skillet, add the onion, and cook over low heat, stirring occasionally, for 5 minutes. Add the chicken roulades and cook, turning frequently, until browned all over. Season with salt and pepper, increase the heat to high, pour in the wine, and cook until it has reduced slightly. Lower the heat, cover and simmer for 20 minutes. Transfer to a warm serving dish.

Now I was all set. And after it was all ready, I invited a neighbor over to share my non-pasta, Italian meal. And while one can have a great Italian meal without the pasta, you wouldn’t want to have an Italian meal without good company and good conversation. After all, it just wouldn’t be “Italian.”

Friday, July 11, 2014

Pizza: As American as Apple Pie!

“You better cut the pizza in four pieces because I'm not hungry enough to eat six.”

—Yogi Berra

Apple pie? 

Fuggetaboutit! 

Without a doubt, pizza is the most American of American food. Based on my limited research (i.e., Google), we consume about 3 billion pizzas a year or 9.44 pizzas for each and every American! This really should not come as a surprise. After all, have you ever met someone who didn’t like pizza? I know that if I did, I would promptly banish them to Outer Mongolia!  

And despite how “American” we may think pizza is, it has been around in some form for a very, very long time, before American or even Italians discovered it in its most popular form today. The ancient Greeks made flat breads covered with oils, herbs, and cheese, and the Romans covered theirs with cheese and honey, flavored with bay leaves. But pizza as we know it—with tomato sauce—didn’t originate until tomatoes were brought back from the New World in the 16th Century. 

Pizza here, however, was a Johnny-come-lately. It really didn’t really take off until after World War II, when American soldiers who had been stationed in Italy, created a demand for the pizza they had tasted and enjoyed in Italy. Speaking of Italy, if you love pizza, then you must make the pilgrimage and taste it from the original source. In Italy, it is safe to say that pizza is not junk food. It is made with fresh tomatoes, fresh basil, and about half the cheese as its American cousin.

Americans, being the mongrels that we are, took the simple and elegant Italian pizza, and ran with it, creating a crazy and nearly endless list of flavors: hamburger pizza, pizza with clams, alligator pizza, potato and bacon pizza, BBQ pizza, Mexican pizza, and Hawaiian pizza (controversial, but one of my favorites). Tonight, in fact, I tried a pizza I’d never had before at a place called Pies and Pints in Morgantown, West Virginia. This pizza is called the Grape Pie, and it is exactly what it says it is: red grapes, gorgonzola cheese, and rosemary. Admittedly, I was skeptical, but it was pretty darn good. 

The two competing styles of pizza in America are deep dish and New York Style. New York style consists of a thin—Chicagoans would say flimsy—crust which requires a special technique to eat by hand. You take the wide end in your hand and slightly crimp the sides together so the tip doesn’t flip forward. Of course, you could avoid this if you simply used a knife and fork. But many consider this heresy. In fact, the mayor of New York, Bill De Blasio caused quite a stir when, shortly after his election, he was seen eating pizza with a knife and fork. He defended himself by noting that, being of direct Italian heritage, he was eating pizza in the traditional way Italians eat it. De Blasio Eats Pizza  On the complete opposite spectrum lies Chicago style pizza (sometimes called deep-dish), which is served in something that resembles a round cake pan with crust that can be as high as three inches and stuff to the gills with cheese and sausage. Pretty fitting for the City of Big Shoulders.

Personally, I lean toward New York style pizza. Also, I must confess that pizza is my biggest weakness: the one food I cannot live without; the one food I would eat as my last meal on death row. I probably eat pizza at least once—sometimes twice—a week. For me, the best night of the week to eat pizza is Friday while watching a movie. Second best is Saturday while watching SEC football. Of course, the perfect drink with pizza is beer—hands down. My favorite flavor is pepperoni with red onions, though I’m partial to green peppers and mushrooms too.  And speaking of pizzerias, here’s my random list of favorite pizzerias from around the country (though they are heavily weighted to where I live, Birmingham, Alabama):

Birmingham, Alabama

Slice: http://slicebirmingham.com

Davenport’s: http://davenportspizza.com

Cosmo’s: http://www.birminghammenus.com/cosmos/

Atlanta, Georgia

Fellini’s Pizza (Ponce or Peachtree locations): http://www.fellinisatlanta.com/fellinis.html

Savannah, Georgia

Vinnie Van Go-Go’s: http://vinnievangogo.com

New York City

Lombardi’s (apparently, the oldest pizzeria in America): http://firstpizza.com

Lexington, Virginia

Frank’s Pizza: http://frankspizzalexington.com

Rome, Italy

Just about any random trattoria. 


Well, those are my random musings about pizza. Makes you kinda hungry doesn’t it? If so, then go online or pick up the phone and order a pie. And that’s another great thing about pizza in America, it’s just so damn convenient!

Wednesday, July 2, 2014

The Dinner Party

I’m a big fan of Mad Men, especially the show's portrayal of the Sixties. It’s not just that everyone seemed so cool and classy, but that everyone seemed to have had such great dinner parties. They started off with a cocktail, an elegantly lighted cigarette, fondue, crown roast, and chocolate mousse. Of course, this is probably far removed from the truth. But no matter.


© 2014 Chris Terrell
Is it just me, or has the dinner party fallen a bit out of favor in American culture? These days we are more likely to get together with friends at a restaurant or bar and order some pizza, watch a game, and call it quits. Nothing necessarily wrong with this, and it is in keeping with the relaxed nature of American culture in the early 21st Century. And besides, a dinner party—or any party for that matter—takes a lot of work. But then again, there’s a lot to be said for sitting down, sharing a meal, and having an adult conversation—no TV; no kids; and no iPhones. With all this in mind, I decided, after many years of having dinner parties for work events and for clients, to throw one just for fun and just for my friends.

Before I even got to the planning, the cleaning, the shopping, or the cooking, however, I had to find a date. This turned out to be the hardest part about the whole endeavor, something that almost made me throw up my hands and call the whole thing off!  What was it? It was finding a date that worked for everyone! This took—and I’m not kidding—about eight months! “Can’t do that weekend, my son has a soccer tournament.” “Nope, the in-laws are in town.” “Out of town on business that night.” “Sorry, going to Davos.” (Ok, I made that one up.) However, I stuck with it, and finally we all agreed on June 21, 2014: Midsummer’s Eve. 

Once I had the date nailed down, I then began to spend a fair amount of time thinking about the menu during my morning runs. Because the dinner would be held on Midsummer’s Eve, I thought I should keep the meal light, and I didn’t want to make anything new for the first time (see “Rule #2” below). I also decided to serve dinner in courses, not to be fancy, but for a very practical reason, namely, my dinner table simply isn’t big enough for all the food to be served at once. 

I started with a simple salad—butter lettuce and radishes and a vinaigrette  I don’t really follow a recipe for my dressings. I go with really good olive oil (Ravida), Dijon mustard, white wine vinegar, shallots, egg yolk, salt and pepper. (And please, don’t ever buy that stuff they sell in bottles at the grocery store—it’s not real salad dressing!)

Next, I served gazpacho. I used Ina Garten’s recipe, which has never done me wrong. Gazpacho is great in the summer and it can be made a day before. In fact, it is better after a day or two. Taste it before serving, because cold foods sometimes need more salt and pepper. Here’s her recipe:

Ina Garten's Gazpacho

Ingredients

2 hothouse cucumbers, halved and seeded, but not peeled 
3 red bell peppers, cored and seeded 
8 plum tomatoes 
2 red onions 
6 garlic cloves, minced 
46 ounces tomato juice (6 cups) 
1/2 cup white wine vinegar 
1/2 cup good olive oil 
1 tablespoon kosher salt 
1 1/2 teaspoons freshly ground black pepper 

Preparation

Roughly chop the cucumbers, bell peppers, tomatoes, and red onions into 1-inch cubes. Put each vegetable separately into a food processor fitted with a steel blade and pulse until it is coarsely chopped. Do not overprocess! 

After each vegetable is processed, combine them in a large bowl and add the garlic, tomato juice, vinegar, olive oil, salt, and pepper. Mix well and chill before serving. The longer gazpacho sits, the more the flavors develop. 

Next came the main course: shallow poached halibut with sauce vierge. This recipe comes from Eric Ripert, a true god in the culinary firmament. The sauce can be made the day before, and the fish takes no time at all to cook. (You can use turbot too, which is a little cheaper than halibut.) Here’s the recipe:

Eric Ripert's Shallow Poached Halibut with Sauce Vierge

The Sauce Vierge

1 cup Extra Virgin Olive Oil
1 teaspoon finely minced shallot
1 tablespoon minced parsley
1 tablespoon minced tarragon
1 tablespoon minced basil
1 tablespoon chopped capers
1 tablespoon chopped Nicoise olives
Juice of half a lemon

The Garnish

4 ripe tomatoes sliced thinly, about 1/4 - inch
1/2 cup thinly sliced basil
Halibut
4 (6-ounce) Halibut filets, sliced lengthwise into thirds, about 3/4- inch thick
2 cups water (more if needed)
2 tablespoons extra virgin olive oil
1 tablespoon freshly squeezed lemon juice
Salt and freshly ground white pepper

Preparation

To make the sauce, place the extra virgin olive oil in a mixing bowl and add the shallot, parsley, tarragon, basil, capers and olives. Stir to combine the ingredients and transfer to a small container. The sauce can be made a couple hours ahead and kept at room temperature.

Make the plates just before cooking the fish by fanning the sliced tomatoes in a circle in the center of four plates and season lightly with salt and white pepper.

Place a large sauté pan on medium-low heat and add the water, the extra virgin olive oil and lemon juice, lightly season the liquid with salt and white pepper. Season the slices of halibut on both sides with salt and white pepper and place in a single layer in the warmed poaching liquid. The liquid should come about halfway up the fish, adjust if needed with more. Cook the fish for about 2-3 minutes, then flip the slices and cook on the other side until they are just warmed in the center.

With the fish, I served what was perhaps the most popular item of the night: creamed corn, a perfect summer dish. But this wasn’t just any creamed corn, but Thomas Keller’s recipe. I’ve written about this recipe before. It is the real deal. The best recipe for creamed corn out there. And while I don’t usually follow recipes to the letter, this one I do. In fact, Thomas Keller’s recipes are so precise they really leave little room for experimentation. But that’s OK, because his recipes are damn-near perfect. Here it is:

Thomas Keller's Creamed Corn from Ad Hoc at Home

Ingredients

6 ears of supersweet white or yellow con, shucked
1 large lime 
3 tablespoons unsalted butter
Kosher salt
3/4 to 1 cup heavy cream
1/8 teaspoon cayenne pepper
1 1/2 tablespoons finely chopped chives

Preparation

With a sharp chef's knife, cut vertically down each ear of corn to slice off the kernels. 

Grate the zest of the lime, preferably with a Microplaner grater, set aside. Cut the lime in half.

Melt the butter in a large frying pan over medium heat.  Add the corn, squeeze about 1 tablespoon lime juice, or to taste, over the corn, and season with salt. Reduce the heat to medium-low and cook until all the liquid has evaporated, concentrating the flavor, and the corn is beginning to sizzle, about 15-17 minutes.

Stir in 3/4 cup cream, the cayenne, and the lime zest. Continue to cook for 6 to 8 minutes, until the cream is absorbed by the corn. Add up to 1/4 a cup of more cream if desired for a creamier texture. Add salt to taste and stir in the chives.

Serves 8

Finally, there was dessert. This came from one of my favorite dessert cookbooks of all time, Short & Sweet by Melanie Barnard.  All her recipes are simple, yet elegant. In fact, your guests will think you spent the better part of an afternoon working on it. Again, this is something that can be made ahead of time, about three or four hours before dinner.

Raspberries in Chantilly Cream

Ingredients

2 cups heavy cream, chilled
1/2 cup seedless raspberry jam
1/2 cup powdered sugar
2 tablespoons raspberry liqueur, such as Frambois
4 cups fresh raspberries

Preparation

Whip the cream with the jam, powdered sugar, and liqueur until it's thickened and forms very soft peaks. (The cream can be prepared up to 2 hours before serving and refrigerated.) Divide the cream among 4 shallow desert bowls. (Or martini glasses for a more dramatic effect.). Sprinkle the berries over the top of each desert. Serve immediately. (You can also put the raspberries in the bottom and the cream on top, if you want to have the entire desert completed beforehand.)

So what did I learn from this dinner party and the others that I’ve had in the past? I came up with ten “rules,” and while not exactly The Ten Commandments, they are certainly easier to follow. 

The “Rules”

1. Focus first and foremost on the menu. The menu takes careful planning.  You must accommodate your guests’ tastes, preferences, and food allergies, but more importantly, you need to create a meal that doesn’t make you a slave of the kitchen. No one wants to go to a dinner party and see the back of the host’s or hostess’s head, frantically whisking the hollandaise sauce.

2. Don’t cook anything that you’ve never cooked before. You’re guests are not Guinea pigs!

3. Have a signature cocktail. This avoids the problem of making personalized drinks from the bar. Make it easy by having it pre-mixed and in a pitcher so that your guests need only add ice and pour. 

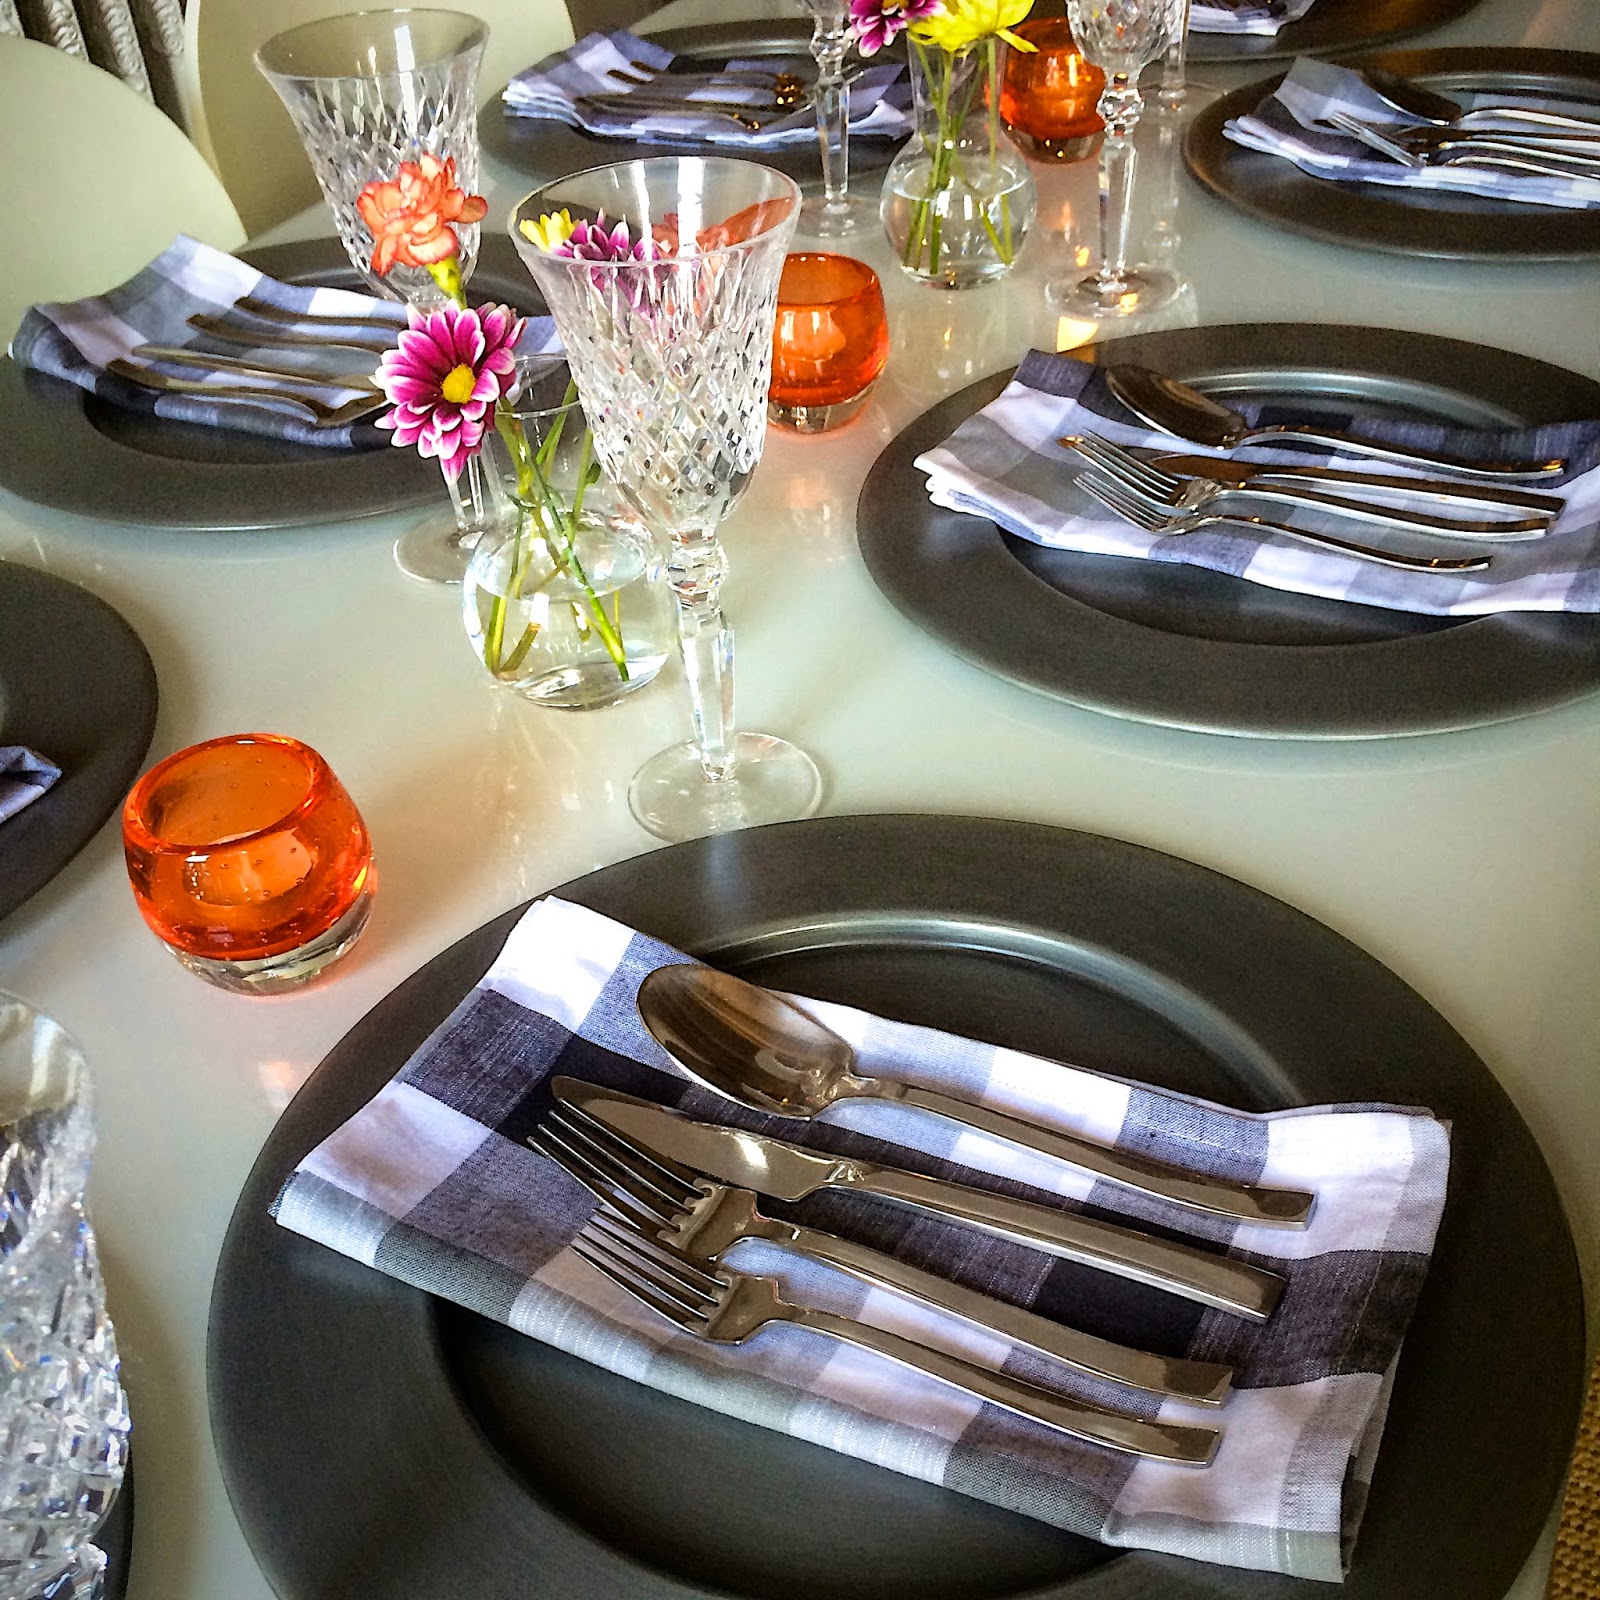
4. Flowers. And flowers on the table. Nothing fancy, just simple arrangements. 

5. Play music. I prefer mid-Century, West Coast jazz, like Paul Desmond.

6. Make a charcuterie platter.

7. Greet your guests at the door and see them to the door when they leave.

8. And most importantly, never apologize. (Though I admit that I violated this rule several times during the evening because I felt the halibut could have been seasoned more.

9. Keep it simple and casual.

10. Most importantly, have fun!


Well, there you have it. My Midsummer’s Eve dinner party. I know it sounds like a lot of work, and it was, but also entirely worth it when you see everyone laughing and having a good time. And besides, I got to enjoy the leftovers of that creamed corn for several days!